
Subcutaneous Injection Guide for Peptides | PeptideIQ
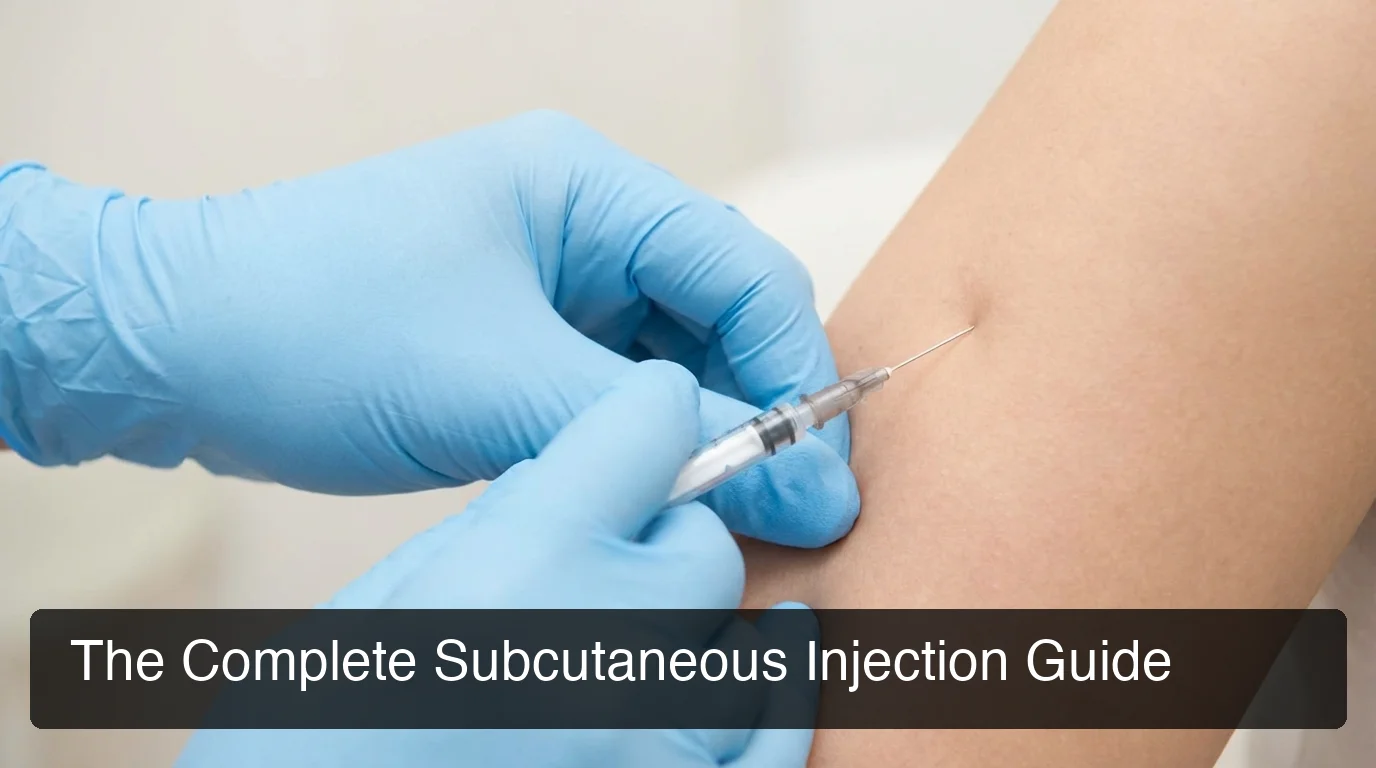
Subcutaneous Injection Guide: How to Self-Administer Peptides Safely
This subcutaneous injection guide covers everything you need to confidently self-administer peptides — from equipment selection to step-by-step technique. If you have a vial in your fridge and have never given yourself an injection, the process is simpler than you think. Most people master it in one or two tries.
Key Takeaways
- Subcutaneous injection delivers peptides into the fat layer just beneath the skin — the easiest, safest self-administration route.
- You need four supplies: an insulin syringe (27-31 gauge), alcohol swabs, your reconstituted peptide, and a clean workspace.
- Insert the needle at 45-90 degrees into pinched skin; the abdomen is the most popular and accessible injection site.
- Rotate injection sites every dose to prevent lipodystrophy (localized fat loss) and maintain consistent absorption.
- Pain is minimal with proper gauge selection, room-temperature medication, and slow injection speed.
Contents
- What Is a Subcutaneous Injection?
- What Equipment Do You Need for a Safe Subcutaneous Peptide Injection?
- How Do You Follow a Subcutaneous Injection Guide Step by Step?
- Which Sites Are Safest for Subcutaneous Peptide Injection?
- Is Subcutaneous Injection Painful, and How Do You Minimize Discomfort?
- What's the Difference Between Subcutaneous and Intramuscular Injection?
- Why Does Every Subcutaneous Injection Guide Recommend This Route for Peptides?
- Can You Perform Subcutaneous Injections on Yourself, and Is It Safe?
- Get Started with PeptideIQ
- Frequently Asked Questions
What Is a Subcutaneous Injection?
A subcutaneous injection delivers medication into the adipose (fat) tissue layer directly beneath the skin — not into muscle. The needle enters at a shallow 45-90 degree angle and deposits the compound in the subcutaneous space where it absorbs gradually into the bloodstream, producing the stable, sustained release profile that makes it ideal for peptide protocols.
The skin has three layers: epidermis (surface), dermis (middle), and the subcutaneous fat layer underneath. A subcutaneous injection targets only that third layer — approximately 8-13mm deep depending on body composition. You are not going into muscle.
This controlled absorption rate is exactly why most peptides — BPC-157, CJC-1295, Ipamorelin, semaglutide, TB-500 — are administered subcutaneously. The fat layer acts as a slow-release depot, smoothing out concentration spikes that can trigger receptor downregulation.
Key insight: Subcutaneous injection is not the same as intradermal (into the skin itself) or intramuscular (into muscle). Depth and angle distinguish them — and getting this right affects both comfort and absorption.
What Equipment Do You Need for a Safe Subcutaneous Peptide Injection?
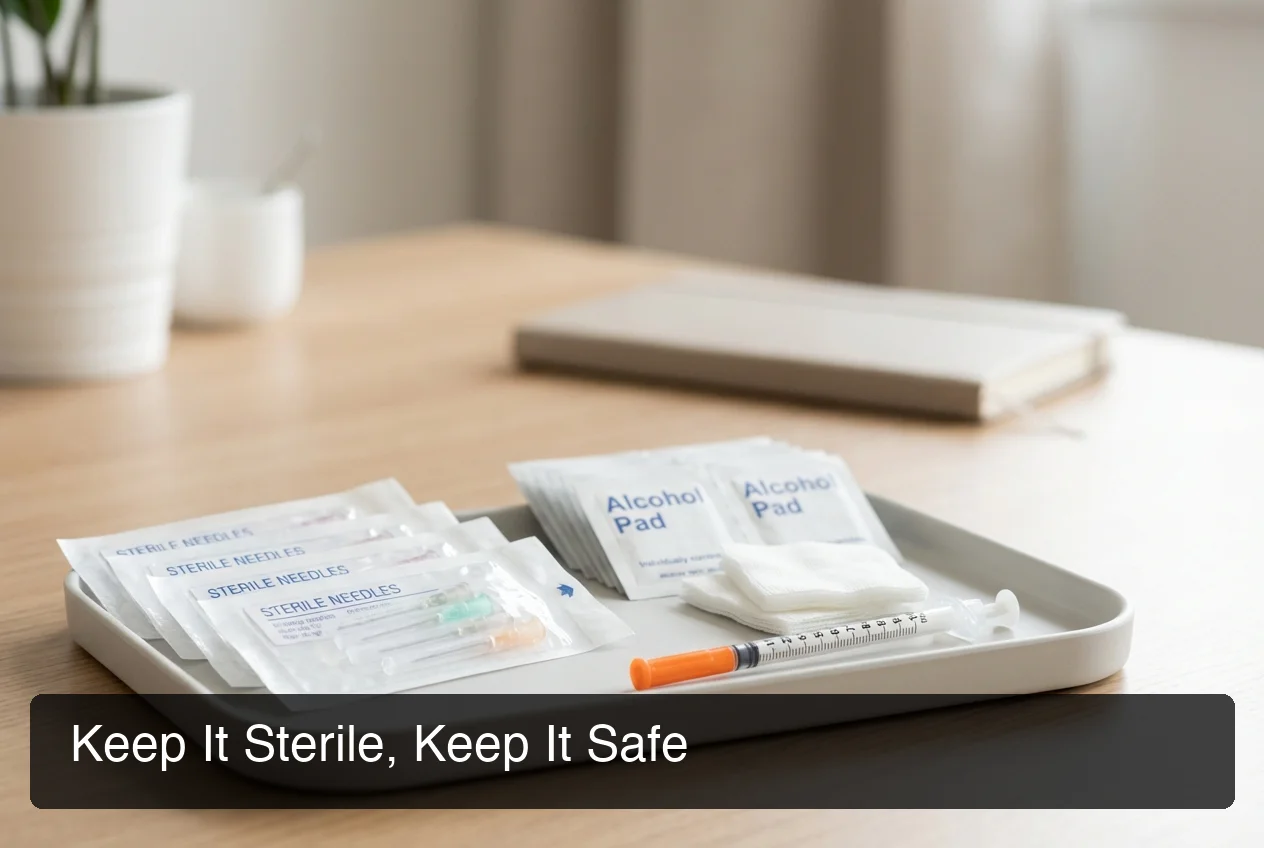
For a subcutaneous peptide injection, you need five items: an insulin syringe (27-31 gauge, 5/16" to 1/2" needle), your reconstituted peptide vial, alcohol swabs, sterile gauze or cotton, and a sharps disposal container. No special training or complex equipment required.
 Complete subcutaneous injection setup — sterile supplies, proper needle gauge, and a clean workspace are all you need.
Choosing the Right Syringe
Insulin syringes (U-100) are the standard for peptide injections. The 1mL barrel with 100-unit markings delivers accurate dosing from reconstituted vials.
Needle gauge guide:
- 29-31 gauge: Best for most users — thinnest needle, minimal pain, suitable for lean to average body composition
- 27-28 gauge: Slightly thicker, flows faster; useful for viscous compounds or users with more subcutaneous fat
- Needle length: 5/16" (8mm) covers most injection sites; use 1/2" (12mm) only if you have significant subcutaneous fat
What NOT to Reuse
Never reuse needles. A used needle develops micro-barbs on the tip that increase pain and introduce infection risk. Insulin syringes cost $0.10-0.25 each — there is no cost justification for reuse.
By the numbers: A full month of daily subcutaneous injections costs under $8 in supplies — needles and alcohol swabs combined. Cutting corners here is never worth it.
How Do You Follow a Subcutaneous Injection Guide Step by Step?
The five-step subcutaneous injection process: wash hands, draw the dose, clean the injection site and wait 15 seconds for it to dry, pinch 1-2 inches of skin and fat, insert needle at 45-90 degrees, inject slowly over 5-10 seconds, withdraw, and apply gentle pressure. The entire procedure takes under 60 seconds once you have done it twice.
Step 1 — Prepare Your Workspace
Wash your hands thoroughly for 20 seconds. Clear a clean, flat surface. Lay out your supplies: syringe, peptide vial, alcohol swabs, and gauze.
Step 2 — Draw the Dose
Wipe the vial top with an alcohol swab. Draw air equal to your dose volume into the syringe, insert into the vial, push the air in, invert the vial, and draw out your dose. Remove any air bubbles by tapping the syringe and pushing them out slowly.
Step 3 — Prepare the Injection Site
Wipe the injection site with an alcohol swab using a circular motion. Wait 15-30 seconds for the alcohol to fully evaporate. Injecting through wet alcohol stings noticeably more and introduces alcohol directly into the subcutaneous space.
Step 4 — Insert the Needle
With your non-dominant hand, pinch 1-2 inches of skin and fat between your thumb and forefinger — do not grip muscle. With your dominant hand, insert the needle at a 45-degree angle for lean sites or a 90-degree angle where more subcutaneous fat is present. The needle should be fully covered by skin.
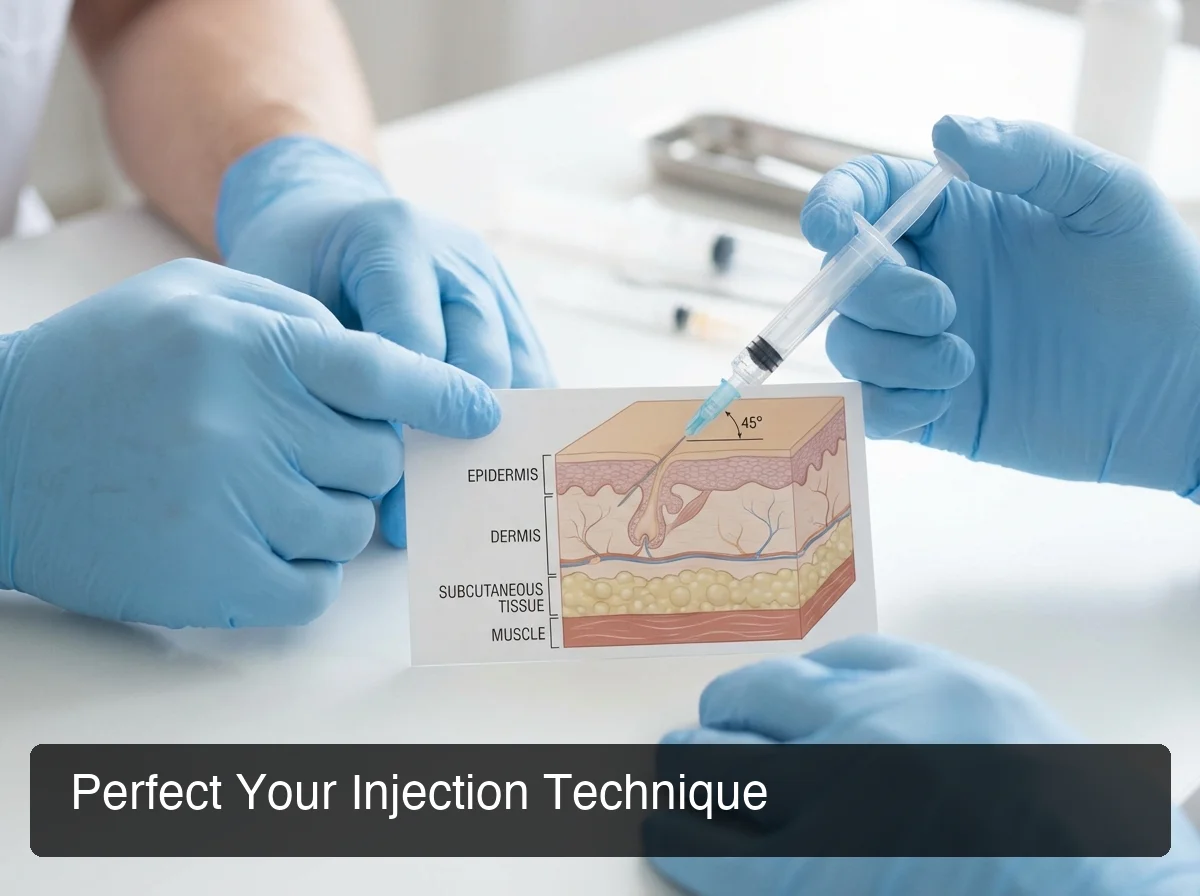 Proper needle angle for subcutaneous injection — 45 degrees for leaner sites, 90 degrees where more fat is present.
Step 5 — Inject and Withdraw
Inject the solution slowly and steadily — aim for 5-10 seconds for a typical 0.1-0.3mL dose. Fast injection causes unnecessary stinging.
After the full dose is delivered, withdraw the needle at the same angle it entered. Apply light pressure with gauze for 10-15 seconds — do not rub.
Key insight: The slow injection rule matters most at 90 degrees. Rapid injection creates a pressure pocket in the subcutaneous space that stings for several minutes. Slow and steady eliminates this entirely.
Which Sites Are Safest for Subcutaneous Peptide Injection?
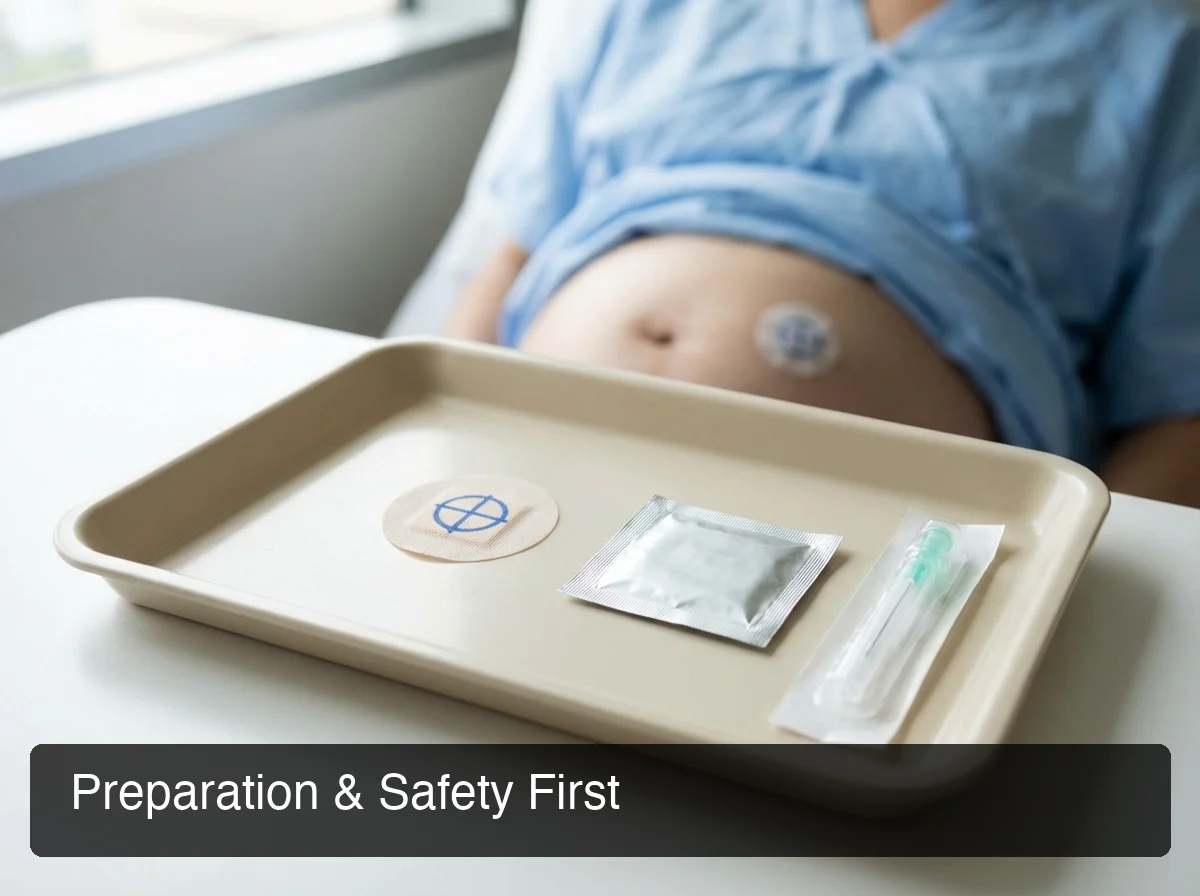 Proper injection site preparation — organized supplies and a clearly identified injection zone reduce error and infection risk.
The abdomen is the primary subcutaneous injection site for peptides — highest vascularity, easiest self-access, most forgiving for beginners. Secondary sites include the outer thigh, lateral hip (flank), and upper arm. Avoid the 2-inch radius around the navel, bruised or inflamed areas, and any spot used in the past 48 hours.
Site Rotation Is Non-Negotiable
Injecting into the same spot repeatedly causes lipodystrophy — localized damage to the fat tissue that creates lumps, hardens the area, and reduces absorption. Rotate at least 2-3cm apart with every injection.
A simple rotation system for the abdomen:
- Divide the abdomen into clock positions (12, 2, 4, 6, 8, 10 o'clock)
- Move one position with each injection
- Alternate sides (left and right of navel)
For detailed guidance on body landmarks and anatomy-specific site selection, see the complete guide to peptide injection sites. Once you have your technique down, learn which injection sites work best for your specific peptides to maximize absorption for your protocol.
Bottom line: Site rotation is the single most important long-term practice in subcutaneous injection. Most users who develop lumps or inconsistent results are rotating insufficiently — or not at all.
Abdomen (Most Recommended)
The abdominal fat layer is thick enough to accommodate most needle lengths, highly vascular for good absorption, and within easy visual reach for self-injection. Stay 2 inches below the ribcage and away from the navel perimeter.
Thigh
The outer front quadrant of the thigh (vastus lateralis area) is a reliable secondary site. Avoid the inner thigh — too vascular with risk of intramuscular injection in lean individuals. Works well for bedtime doses when you are already seated.
Upper Arm
The lateral upper arm is viable but harder to reach solo. Best used when alternating with other sites to give the abdomen and thigh adequate rest time between injections.
Is Subcutaneous Injection Painful, and How Do You Minimize Discomfort?
A properly executed subcutaneous injection with a 29-31 gauge needle produces minimal pain — most users describe a brief pinch followed by nothing. Discomfort comes from cold medication, wet injection sites, dull needles, fast injection speed, and inadvertently hitting muscle. Correct technique eliminates all five.
The Five Pain Sources — and Their Fixes
| Pain Cause | Prevention |
|---|---|
| Cold medication | Bring vial to room temperature (15 min before injection) |
| Alcohol still wet | Wait 15-30 sec after swabbing before injecting |
| Dull or reused needle | New needle every injection, always |
| Injecting too fast | Slow injection: 5-10 seconds for small volumes |
| Wrong angle (muscle hit) | Pinch fat properly; use 45° for lean areas |
Managing Post-Injection Soreness
Mild soreness at the injection site for 1-2 hours is normal, especially in new users. Persistent redness, swelling beyond the injection point, or warmth lasting more than a few hours may indicate improper technique or early infection — monitor and seek guidance if it does not resolve.
What's the Difference Between Subcutaneous and Intramuscular Injection?
Subcutaneous injection targets the fat layer 8-13mm deep for slow, sustained absorption. Intramuscular injection reaches muscle 2-4cm deep for faster, more complete uptake. Most peptides work best subcutaneously — the slower absorption curve matches their short half-lives and prevents the concentration spikes that cause receptor downregulation.
| Factor | Subcutaneous | Intramuscular |
|---|---|---|
| Depth | 8-13mm (fat layer) | 2-4cm (muscle) |
| Angle | 45-90 degrees | 90 degrees |
| Absorption speed | Slower (hours) | Faster (minutes to 1 hour) |
| Pain level | Minimal | Moderate |
| Self-injection ease | Easy | Harder (limited sites) |
| Common peptides | BPC-157, GHK-Cu, GLP-1s, CJC-1295 | TB-500 (some protocols) |
| Needle gauge | 27-31g | 21-25g |
The practical implication: the peptides most users encounter — BPC-157, semaglutide, CJC-1295, Ipamorelin, GHK-Cu — are subcutaneous by design. If you are using semaglutide or another GLP-1, see our guide to managing Ozempic side effects to understand what's normal during the first weeks. Some TB-500 and Sermorelin protocols suggest intramuscular for specific outcomes, but subcutaneous is the correct default for self-administration.
Key insight: Never substitute intramuscular for subcutaneous without confirming the protocol requires it. A 27-gauge insulin syringe is too short for reliable intramuscular delivery in most muscle groups.
Why Does Every Subcutaneous Injection Guide Recommend This Route for Peptides?
Subcutaneous injection is the standard route for peptides because the fat layer provides steady, sustained absorption that matches peptides' short half-lives. It eliminates the concentration spike and crash pattern that faster delivery routes produce, makes reproducible self-administration practical, and is the route used in all major clinical peptide protocols.
Three reasons it dominates peptide protocols:
1. Absorption curve alignment. Peptides like BPC-157 and Ipamorelin have short to medium half-lives. Subcutaneous absorption smooths the peak, letting the peptide circulate long enough to reach target receptors without the sharp spike that IM or IV delivery produces.
2. Accessibility. Every abdominal injection site is within easy self-reach. No assistance required, no special training — you can do this independently before work.
3. Consistency. Subcutaneous fat absorbs predictably. Muscle absorption varies with blood flow and activity level, introducing variability that complicates dosing. Fat is a stable, reproducible medium.
Can You Perform Subcutaneous Injections on Yourself, and Is It Safe?
Yes. Self-administered subcutaneous injection is standard practice for millions of people worldwide — insulin-dependent diabetics, GLP-1 users, and peptide protocol users all self-inject routinely. With sterile technique, correct needle gauge, proper site selection, and rotation discipline, home subcutaneous injection is safe and complication-free for the vast majority of users.
What Makes It Safe
The risk profile of subcutaneous injection is well-studied from decades of insulin therapy. The main risks — infection, lipodystrophy, and injection site reactions — are all technique-dependent, not inherent to the method itself.
The non-negotiable safety checklist:
- New needle every injection
- Alcohol-cleaned and fully dried injection site
- No injection into damaged, infected, or bruised skin
- Proper sharps disposal (never loose in household trash)
- Site rotation at every injection
When to Seek Medical Guidance
Significant swelling, spreading redness, fever, or persistent lumps at injection sites should be evaluated by a healthcare provider. These are rare with correct technique but warrant attention when they occur.
 A clean, organized workspace with labeled sterile supplies is the foundation of safe subcutaneous injection practice.
Bottom line: The technique itself carries minimal risk. The risks that exist — infection, lipodystrophy — are almost entirely eliminated by following the checklist above. Millions of people self-inject daily without complications.
Get Started with PeptideIQ
Subcutaneous technique is one piece of the puzzle. If you want to master subcutaneous, intramuscular, and all peptide injection methods, the full injection guide covers every delivery route.
Managing a peptide protocol goes beyond technique — it requires tracking doses, rotating sites systematically, monitoring how your body responds week over week, and adjusting as your cycle progresses. PeptideIQ is the AI-powered guided system built for exactly this: it tracks injection site rotation automatically, calculates your dose from vial concentration, and gives you an AI co-pilot that knows your specific cycle data.
Frequently Asked Questions
How do you properly do a subcutaneous injection?
Wash hands, draw your dose, swab the site and wait 15-30 seconds for it to dry. Pinch 1-2 inches of skin and fat, insert a 27-31 gauge needle at 45-90 degrees until fully covered, inject slowly over 5-10 seconds, withdraw, and apply light pressure. Use a new needle every time.
Do you have to pinch fat for subcutaneous injection?
Yes, for most users — pinching lifts the fat layer away from muscle, ensuring the injection lands in subcutaneous tissue rather than muscle. Very lean individuals especially need to pinch. Users with significant abdominal fat may inject at 90 degrees without pinching in that specific area, provided the fat layer depth is adequate.
How do you inject BPC-157 subcutaneously?
Reconstitute your BPC-157 vial with bacteriostatic water, draw your calculated dose (typically 250-500mcg) into a 29-31 gauge insulin syringe, pinch abdominal fat, and inject at a 45-degree angle. Inject slowly and apply light pressure after withdrawal. Rotate the injection site with every dose to prevent lipodystrophy.
What is the correct angle for subcutaneous injection?
45 degrees for lean injection sites and 90 degrees for sites with more subcutaneous fat thickness. The goal is to seat the needle fully in the fat layer.
If you are injecting at 90 degrees and there is not enough fat, you risk hitting muscle. When uncertain, start with 45 degrees — it works across a wider range of body compositions.
Where do you inject sermorelin subcutaneously?
Sermorelin is most commonly injected in the abdomen, 2+ inches from the navel. It requires bedtime administration on an empty stomach to align with the natural growth hormone pulse. The subcutaneous technique is identical to other peptides — 29-31 gauge insulin syringe, 45-90 degree angle, rotated sites.
How do you minimize pain from subcutaneous injection?
Bring the vial to room temperature before injecting, always use a new needle, wait for the alcohol swab to fully dry, inject slowly (5-10 seconds), and use the thinnest gauge that works for your compound (29-31g for most peptides). These five adjustments reduce injection discomfort to near-zero for most users.